iOS最为简单时间轴(GZTimeLine)
技术:Object-C
概述
迄今为止最为简单的时间轴 :可以自定义(类似于美团的送餐信息)
详细
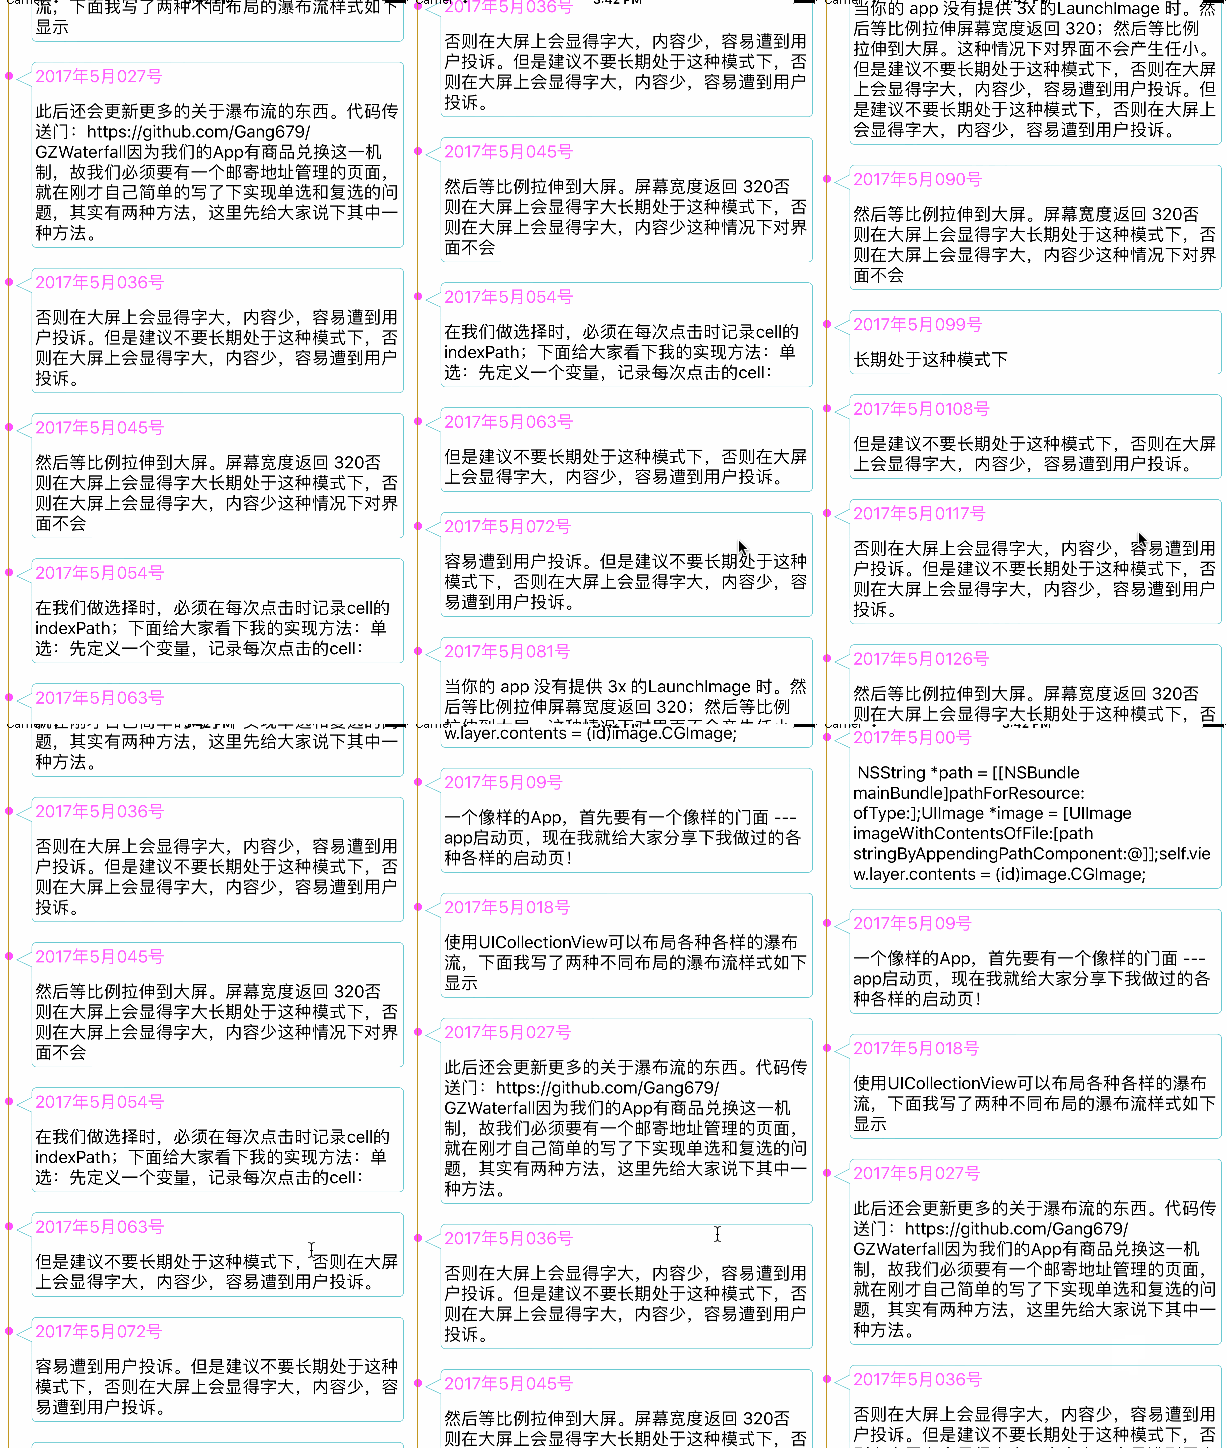
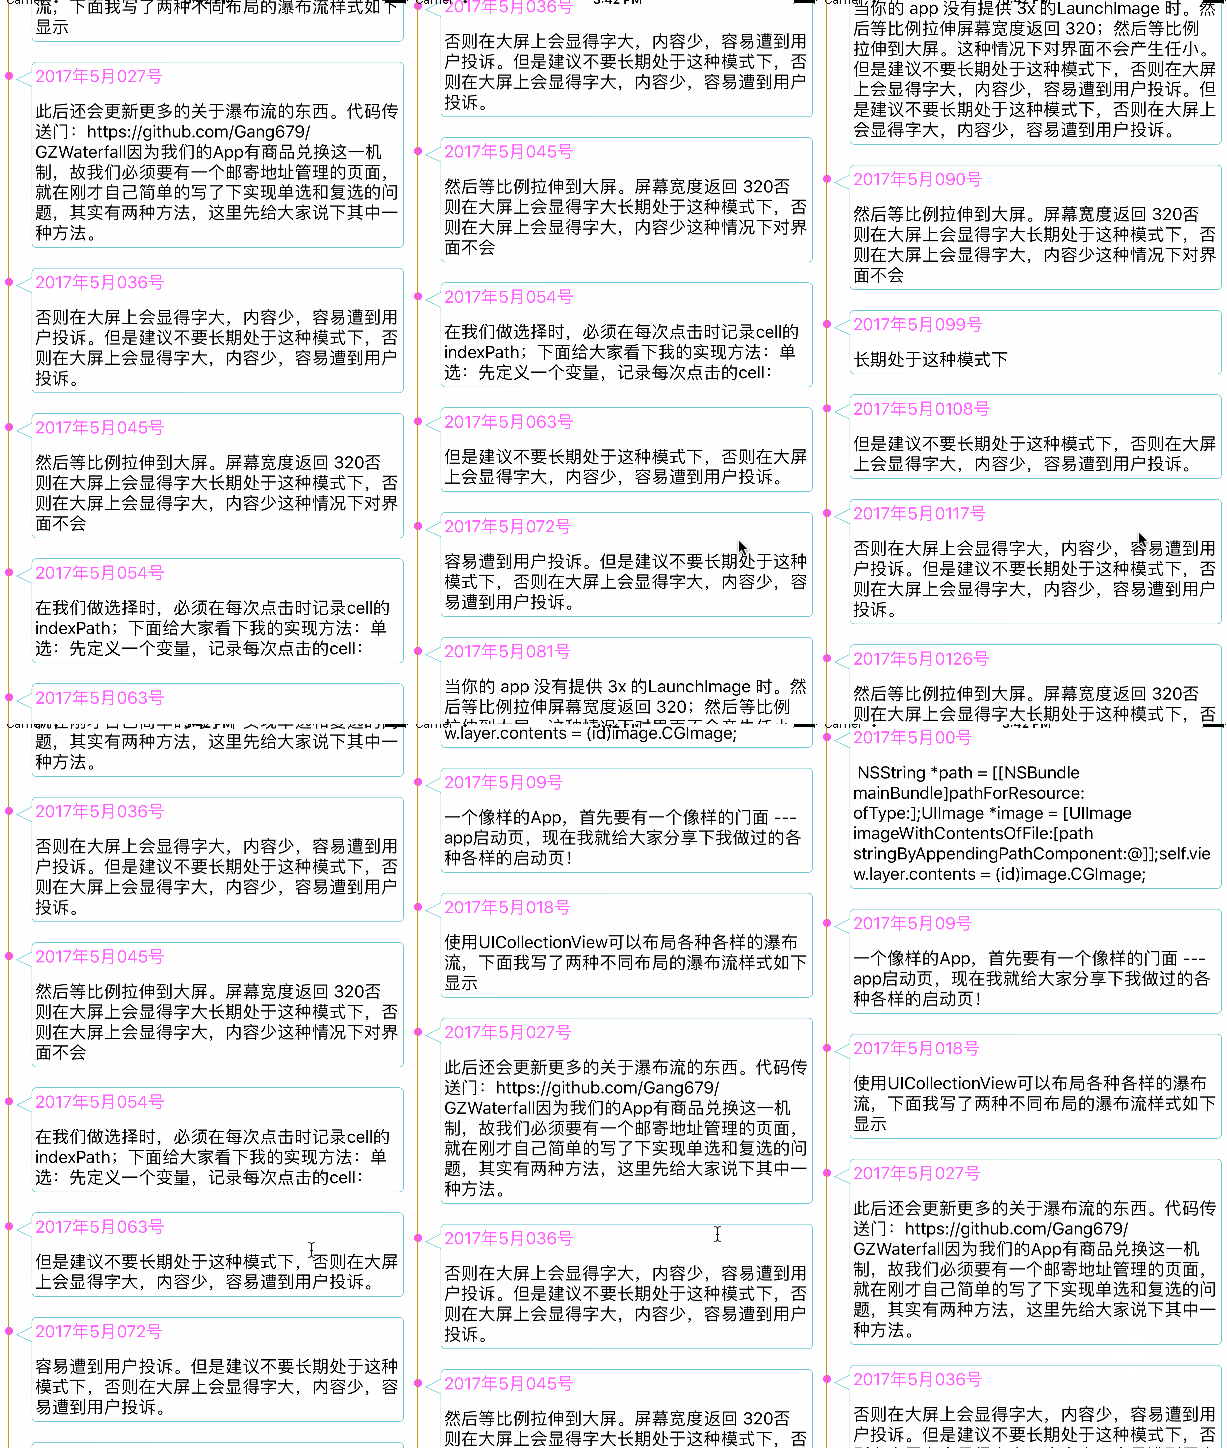
迄今为止 最为简单的时间轴 :可以自定义(类似于美团的送餐信息) 示例图如下:

一、准备工作
现在,在多数的项目中都会用到这样的东西,尤其是商城类项目,里面有物流信息的,此版时间轴项目最为通熟易懂,就算你是iOS开发大白,看到里面的流程 介绍,你都会试着写。
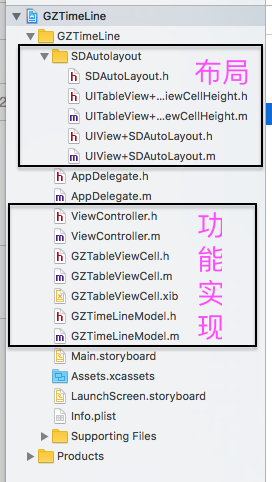
首先给大家看下项目整体结构,在项目中我是用的是SDAutolayout布局库,当然打击也可以使用原生的进行布局,也可使用其他的,如果想看原生布局的话,我会写个放上面,供大家使用。

二、程序实现
里面主要就是运用TableView的一些属性,对数据进行处理,在项目中每条信息的周围都有线条,而且它是随着信息多少随之变化,始终讲数据包在里面,这里面主要运用了UIImage中的
- (UIImage *)stretchableImageWithLeftCapWidth:(NSInteger)leftCapWidth topCapHeight:(NSInteger)topCapHeight __TVOS_PROHIBITED;
对边框进行处理
主要是运用TableView 每条物流信息都占据一个cell,自动适应cell的高度,给其设置需要的边框样式,可以自己随意修改。
1、根据数据来获取高度
#pragma mark -- 每个cell的高度
- (CGFloat)tableView:(UITableView *)tableView heightForRowAtIndexPath:(NSIndexPath *)indexPath
{
    id model = self.TimeLineData[indexPath.row];
    return [self.GZTableView cellHeightForIndexPath:indexPath model:model keyPath:@"model" cellClass:[GZTableViewCell class] contentViewWidth:[self cellContentViewWith]];
}
2、对结构进行布局
self.contentView.backgroundColor = [UIColor whiteColor];
    self.point.sd_layout.topSpaceToView(self.contentView, 20).leftSpaceToView(self.contentView, 5).widthIs(8).heightEqualToWidth();
    self.point.sd_cornerRadius = @(4);

    self.GZLine.sd_layout.topEqualToView(self.contentView).centerXEqualToView(self.point).widthIs(1).bottomSpaceToView(self.contentView, 0);

    self.GZIma.sd_layout.topSpaceToView(self.contentView , 10).leftSpaceToView(self.point, 3).bottomSpaceToView(self.contentView, 10).rightSpaceToView(self.contentView, 10);
    _GZIma.image = [UIImage imageNamed:@"WechatIMG3"];
    // 指定为拉伸模式,伸缩后重新赋值

    self.GZIma.image = [self.GZIma.image stretchableImageWithLeftCapWidth:20 topCapHeight:30];

    self.TimeLabel.sd_layout.centerYEqualToView(self.point).leftSpaceToView(self.contentView, 35).rightSpaceToView(self.contentView, 15).heightIs(20);
    self.ContentLabel.sd_layout.topSpaceToView(self.TimeLabel, 15).leftEqualToView(self.TimeLabel).rightSpaceToView(self.contentView, 15).autoHeightRatio(0);
3、数据模型
#import <Foundation/Foundation.h>
@interface GZTimeLineModel : NSObject
@property (nonatomic, strong) NSString *title;
@property(nonatomic,copy)NSString* time;
@end

布局
@property (strong, nonatomic) IBOutlet UIView *point;
@property (strong, nonatomic) IBOutlet UIView *GZLine;
@property (nonatomic, strong)GZTimeLineModel *model;
@property (strong, nonatomic) IBOutlet UIImageView *GZIma;
@property (strong, nonatomic) IBOutlet UILabel *TimeLabel;
@property (strong, nonatomic) IBOutlet UILabel *ContentLabel;

实现

@property (nonatomic, strong) UITableView *GZTableView;
@property (nonatomic, strong) NSMutableArray *TimeLineData;


懒加载
-(UITableView *)GZTableView{
    if (!_GZTableView) {
        _GZTableView = [[UITableView alloc]initWithFrame:CGRectMake(0, 0, self.view.bounds.size.width, self.view.bounds.size.height)];
        [self.view addSubview:_GZTableView];
        _GZTableView.delegate = self ;
        _GZTableView.dataSource = self ;
        self.GZTableView.separatorStyle = UITableViewCellSeparatorStyleNone ;
    }
    return _GZTableView ;
}
三、运行效果
此项目不需要任何账户,只需简单的下载就可看到你想要的效果
可以设置成自己喜欢的 需要的各种类型。
运行效果图如下所示:

本实例支付的费用只是购买源码的费用,如有疑问欢迎在文末留言交流,如需作者在线代码指导、定制等,在作者开启付费服务后,可以点击“购买服务”进行实时联系,请知悉,谢谢
手机上随时阅读、收藏该文章 ?请扫下方二维码


